Chevy Bolt EV Forum banner
  • Hey Guest, welcome to ChevyBolt.org. We encourage you to register to engage in conversations about your Bolt.
  • Battery replacement master thread - please do not create a new thread.

Front spring change is a pain in the butt!

21K views 26 replies 14 participants last post by  1960sc2  
#1 ·
I am 90% done with the front spring change out (done with the spring compressors so I can return them to Autozone after work tonight) and I have to say, having the shock towers hidden up under the windshield makes this a pain in the butt!

Here is a quick wright up.

Step 1: Remove the wipers by prying off the cover over the nut, remove the nut, and then remove the hold downs for air inlet screen at the base of the windshield. With the inlet screen loose you can reach under it to the base of the windshield wipers and pry them off of the motors. When the wipers are removed you can now remove the air inlet screen.

Step 2: With the air inlet screen out of the way, you can now get to the windshield wiper motors and remove them to gain access to the shock towers.

Step 3: Jack up the car, put it on jack stands and remove the front wheels.

Step 4: Remove the brake line and wheel speed sensor from the strut assembly.

Step 5: Remove the front swaybar end link. (must have allen wrench to hold shaft still while taking off the nut)

Step 6: Take the nuts off of the two bolts holding the bottom of the strut assembly. Soak in PB blaster or similar and wait a few min, then pound the bolts out (they are knurled shank bolts, can's screw them out)

Step 7: Take out the three bolts holding the top of the strut assembly and remove assembly from car.

Step 8: Use a spring compressor to compress the spring removing the tension from the top hat of the strut assembly.

Step 9: Pop off the plastic cover on the top of the assembly, if you don't have the specific GM tool, use a star bit held in vice grips to hold the shock shaft still while using the correct size socket and vice grips to turn the nut. The star bit held by the vice grips is inserted through the drive hole in the top of the socket, thus requiring the socket be turned with vice grips instead of a ratchet.

Step 10+: Remove old spring and replace with new spring, using spring compressor, star bit, socket and two pair of vice grips... then do everything above in reverse :)

I finished up the passenger side yesterday afternoon, and finished changing the spring on the drivers side, just need to re-install the drivers side assembly, and re-install the wiper motors, air inlet screen, and wiper blades.

Looking at the service manual, the rear should be MUCH simpler!

Keith
 
#4 ·
I am 90% done with the front spring change out (done with the spring compressors so I can return them to Autozone after work tonight) and I have to say, having the shock towers hidden up under the windshield makes this a pain in the butt!

Here is a quick wright up.

Step 9: Pop off the plastic cover on the top of the assembly, if you don't have the specific GM tool, use a star bit held in vice grips to hold the shock shaft still while using the correct size socket and vice grips to turn the nut. The star bit held by the vice grips is inserted through the drive hole in the top of the socket, thus requiring the socket be turned with vice grips instead of a ratchet.


Looking at the service manual, the rear should be MUCH simpler!

Keith
This is why I own a set of pass through sockets!

Can you include up the sizes of the bolts / nuts? I haven't done any work on this car yet, but it's always appreciated when people can pull all of the tools ahead of time based on the write up.

Looking forward to your thoughts on these springs.
 

Attachments

#6 ·
To each their own but I agree with psyflyjohn here. TBH the only way I would look at replacing these;
#1 . The car had over 100K miles and they needed changed out anyway due to poor ride.
#2 . GM offered a Nifty Magnetic ride control Part that had a similar benefit to what they offer on Corvette and Cadillac for a reasonable price (at least comparable to those versions) which Googling it looks to be around $400-$600 PER STRUT depending on where You might shop (Yeah it is expensive but maybe someone already spending around 30K$ would want that too... since they are spending $30k or more)...
https://www.google.com/search?q=GM+...6qbjAhXrAp0JHekAAkEQ_AUIECgB&biw=1707&bih=844&dpr=1.13#spd=14699332468325847969

It is a shame GM didn't make this an option along with a BETTER power seat. As it stands unfortunately the Bolt LOOKS Cheaper than it is (Cheap black plastic that saved them $50 vs. Painting). FEELS Cheaper (due to seats - again maybe $50-$100 could have fixed that), and RIDES cheaper (not sure how much better shocks and rear IRS Vs. Twist beam would have cost , Could it have been that much)???... Stepping up from an '03 Base Alero GX with about 300k Miles Yes it is an upgrade! It could have been sooooo much better.
 
#8 ·
It was raining when I got off work last night, so not done with installation. I will get wrench sizes when I finish up.

The main reason I did this is an attempt to improve high speed aerodynamics by lowering the car approximately one inch. I do a lot of road trips in my Bolt, so an inexpensive set of lowering springs are worth the effort. If they don't show any improvement, no harm, if they do improve aerodynamics bonus!

Keith
 
#9 ·
Let us know how much they drop the car and how often the car bottoms out with the springs.
I'd like the handling and appearance benefits of the Eibach springs, but having the battery bottom out would make me really nervous.
I'll probably settle for a rear sway bar for handling and easier installation. I've already got Bilstein rear shocks on my `19.
 
#11 ·
Finished up the Front suspension last night, here are wrench sizes. I can get most of the torque specifications tonight at home.

The windshield wiper arms are held on by 15 mm nuts.

The windshield wiper motors are held on by 10 mm bolts.

The sway bar end link needs a 6 mm allen wrench and a 18 mm wrench for the nut.

The Bottom nuts for the strut assembly are 21 mm.

The bolts holding the top of the strut assembly are 13 mm.

The strut top hat is held on by a 21 mm nut, and the shaft is prevented from rotating with a T45 star bit.

Later,

Keith
 
#12 · (Edited)
The windshield wiper arms are held on by 15 mm nuts, I didn't get the torque spec for these.

The windshield wiper motors are held on by 10 mm bolts, torque spec 80 inch lbs (inch, not foot)

The sway bar end link needs a 6 mm allen wrench and a 18 mm wrench for the nut. You can torque this using a 18 mm crows foot, torque spec is 74 ft-lbs.

The Bottom nuts for the strut assembly are 21 mm. Torque spec is 118 ft-lbs.

The bolts holding the top of the strut assembly are 13 mm. Torque spec is 16 ft-lbs.

The strut top hat is held on by a 21 mm nut, and the shaft is prevented from rotating with a T45 star bit. I used "get it as tight as you can with improvised tools" torque spec. If you have the special GM strut tool (CH-49375 Strut Wrench) you can torque it to the proper torque spec of 63 ft-lbs.

I finished up the rear springs today... procedure, wrench sizes and torque specs in my next post.

One update on re-installing the second strut assembly. You will need to bolt the strut assembly in place, (top and bottom) and then use a floor jack to compress the spring and shock enough to line up the swaybar endlink. No way is it going to line up with the suspension completely unloaded.

Later,

Keith
 
#13 · (Edited)
Rear spring change out:

Jack up both sides of the rear of the car and place on jack stands.

Place your jack at one end of the twistbeam axle under one of the shocks and jack it up slightly to release tension on the lower shock bolt.

Remove the lower shock bolt on the first side, the nut is part of the shock mount, the bolt is the part that will turn. It is 18 mm.

Lower the jack and place it under the shock on the other side of the twistbeam axle and remove that side lower shock bolt.

SLOWLY lower the jack to release tension on the springs, do this slowly so you don't put stress on the rear brake hoses and wheel speed sensor wires.

At this point you can just pull the old springs out.

Transfer the rubber isolators (top and bottom) to the new springs.

Jack up one side of the twistbeam axle to align the shock mount on that side with the shock lower mounting hole.

Insert the bolt and tighten to 74 lb-ft and then turn an additional 30 to 45 deg.

Jack up the other side and do the same thing.

Put the wheels back on (torque lug nuts to 103 ft-lbs) and grab your beverage of choice!

Keith

PS: Any time I see "torque to xxx and then go yyy deg further" I think "torque to yield bolt, not reusable!!!! But, I didn't have new bolts so I reused the old ones... if anyone knows for a fact that these are NOT reusable, I will order up some factory replacement bolts and install them.
 
#17 ·
Any time I see "torque to xxx and then go yyy deg further" I think "torque to yield bolt, not reusable!!!! But, I didn't have new bolts so I reused the old ones... if anyone knows for a fact that these are NOT reusable, I will order up some factory replacement bolts and install them.
I normally think that as well, but more auto manufacturers are using torque plus degrees for non-TTY fasteners, as it results in more accurate and repeatable clamping forces than a straight torque. You now need to look for the caution in the manual "do not reuse".
 
#16 ·
Hey @Fivedoor thanks a lot for the info in this thread, it helped me a lot doing this job yesterday! Man, the front springs were a huge pain to get back into the strut.

Not to hijack this thread but to keep things in one place, I took some before and after shots and compiled them into an animated .gif for anyone who wants to see the effect these springs will have. It's subtle, 1" isn't a ton, but I like it, and it's still easy to clear speed bumps etc.

Lets see if this forum can handle displaying the gif...

30506


I tried to park in the same place, and do the same amount of paces and get the same camera height, etc but as you can see a few things were off, but I used the wheel centers to line up the car itself, and I think what you see is pretty accurate. I figure I'll get maybe 1-2 more mm as things settle ie, not enough to make much difference from what you see here. This is after 10 or so hours of the car sitting and then having been driven a few miles. I have more angles if anyone's interested.
 
#26 ·
Hey @Fivedoor 1" isn't a ton, but I like it, and it's still easy to clear speed bumps etc
Looka good in the photos and glad it works for you, but our 2017 EV already scrapes bottom on speed bumps in our neighborhood strip mall. We went to 55-series tires to increase the ground clearance and that was just enough so it no longer drags on the speed bumps or scrapes the front spoiler exiting our steep driveway. No possiblity we could live with 1" lower.

jack vines
 
#18 ·
I am 90% done with the front spring change out (done with the spring compressors so I can return them to Autozone after work tonight) and I have to say, having the shock towers hidden up under the windshield makes this a pain in the butt!

Here is a quick wright up.

Step 1: Remove the wipers by prying off the cover over the nut, remove the nut, and then remove the hold downs for air inlet screen at the base of the windshield. With the inlet screen loose you can reach under it to the base of the windshield wipers and pry them off of the motors. When the wipers are removed you can now remove the air inlet screen.

Step 2: With the air inlet screen out of the way, you can now get to the windshield wiper motors and remove them to gain access to the shock towers.

Step 3: Jack up the car, put it on jack stands and remove the front wheels.

Step 4: Remove the brake line and wheel speed sensor from the strut assembly.

Step 5: Remove the front swaybar end link. (must have allen wrench to hold shaft still while taking off the nut)

Step 6: Take the nuts off of the two bolts holding the bottom of the strut assembly. Soak in PB blaster or similar and wait a few min, then pound the bolts out (they are knurled shank bolts, can's screw them out)

Step 7: Take out the three bolts holding the top of the strut assembly and remove assembly from car.

Step 8: Use a spring compressor to compress the spring removing the tension from the top hat of the strut assembly.

Step 9: Pop off the plastic cover on the top of the assembly, if you don't have the specific GM tool, use a star bit held in vice grips to hold the shock shaft still while using the correct size socket and vice grips to turn the nut. The star bit held by the vice grips is inserted through the drive hole in the top of the socket, thus requiring the socket be turned with vice grips instead of a ratchet.

Step 10+: Remove old spring and replace with new spring, using spring compressor, star bit, socket and two pair of vice grips... then do everything above in reverse :)

I finished up the passenger side yesterday afternoon, and finished changing the spring on the drivers side, just need to re-install the drivers side assembly, and re-install the wiper motors, air inlet screen, and wiper blades.

Looking at the service manual, the rear should be MUCH simpler!

Keith
Man I don’t know why GM used those stupid
I am 90% done with the front spring change out (done with the spring compressors so I can return them to Autozone after work tonight) and I have to say, having the shock towers hidden up under the windshield makes this a pain in the butt!

Here is a quick wright up.

Step 1: Remove the wipers by prying off the cover over the nut, remove the nut, and then remove the hold downs for air inlet screen at the base of the windshield. With the inlet screen loose you can reach under it to the base of the windshield wipers and pry them off of the motors. When the wipers are removed you can now remove the air inlet screen.

Step 2: With the air inlet screen out of the way, you can now get to the windshield wiper motors and remove them to gain access to the shock towers.

Step 3: Jack up the car, put it on jack stands and remove the front wheels.

Step 4: Remove the brake line and wheel speed sensor from the strut assembly.

Step 5: Remove the front swaybar end link. (must have allen wrench to hold shaft still while taking off the nut)

Step 6: Take the nuts off of the two bolts holding the bottom of the strut assembly. Soak in PB blaster or similar and wait a few min, then pound the bolts out (they are knurled shank bolts, can's screw them out)

Step 7: Take out the three bolts holding the top of the strut assembly and remove assembly from car.

Step 8: Use a spring compressor to compress the spring removing the tension from the top hat of the strut assembly.

Step 9: Pop off the plastic cover on the top of the assembly, if you don't have the specific GM tool, use a star bit held in vice grips to hold the shock shaft still while using the correct size socket and vice grips to turn the nut. The star bit held by the vice grips is inserted through the drive hole in the top of the socket, thus requiring the socket be turned with vice grips instead of a ratchet.

Step 10+: Remove old spring and replace with new spring, using spring compressor, star bit, socket and two pair of vice grips... then do everything above in reverse :)

I finished up the passenger side yesterday afternoon, and finished changing the spring on the drivers side, just need to re-install the drivers side assembly, and re-install the wiper motors, air inlet screen, and wiper blades.

Looking at the service manual, the rear should be MUCH simpler!

Keith
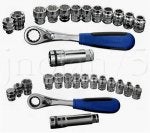
Man I don’t know why GM used those stupid weird strut bolts that you can’t spin to be able to remove the shocks. I spent 4 hrs and I just was able to remove 1 of them the one on the bottom was impossible to remove it.
32978
 
#19 ·
Man I don’t know why GM used those stupid

Man I don’t know why GM used those stupid weird strut bolts that you can’t spin to be able to remove the shocks. I spent 4 hrs and I just was able to remove 1 of them the one on the bottom was impossible to remove it. View attachment 32978
Ummm, you just take off the nut and drive it out with a punch... I hope you didn't try and twist it out...

Keith
 
#21 ·
I know this is an older thread, but wanted to add some more detail if others want. I installed the eibach pro-kit springs on my 2023 EUV last weekend. Used the info from @Fivedoor, thank you!
I however didn’t need to remove the wiper motor, just the plastic cover.
Also, if you are going to get some spring compressors, try to get ones that have a long reach. The ones I used were compact, and the issue is that the bottom of the spring mount is so wide, that I could only use the tool one way, and it was impossible to use an air tool to turn it, so I had to use a combo wrench and do it by hand.. haha..
I will try and add some pictures..
 
#23 ·
Hi, recently purchased a set of eibach springs for my 2019 bolt premier. Planning on tackling down this job this weekend. You mentioned wiper and trying to get as much insight as possible before attempting to do. Besides stating that wiper motors don’t need to be removed any other tips on the procedure ? Thanks in advanced!
 
#27 ·
Oh, and FYI, I just removed my Eibach pro springs, and installed a 20mm or .8 inch lift kit with the OEM springs.. As I like the look, I have realized that I need to drive this thing in the winter here in Denver and have decided to do the “Overlander” look.. or at least try. So if anyone wants a set of minimally used springs, I will sell them.. Once I figure out the largest size tire that will fit, I will post some pictures.